CyberPower Disc Creator, a fast disc burning program, enables you to burn video DVD discs from video files including AVI, MP4, MPEG, WMV and many others to DVD-R and DVD+R discs with ease. You are allowed to burn full movies as well as small clips. Meanwhile, more classic movies or other videos can be burned to DVD discs for re-watching in the future.
What is DVD Burning?
DVD burning is a service that allows you to effectively make your own DVD, whether it is a home video, movie or your favorite series. It is a great way to preserve your TV recordings. DVDs tend to be more durable than their VHS counterparts, and it’s unlikely that you’ll accidentally record over the latest episode of The Office.
Pretty much any drive that can burn a DVD should work with Beyond TV’s DVD Burning & H.264 Plug-in. The plug-in uses burning technology from Sonic Solutions, the same burning technology used by Microsoft (in Windows XP and Vista), Adobe and many other companies. So this technology is well-proven. If you are burning a video DVD with any other MPEG-2 format, the DVD Burning DiscSqueeze technology will compress whatever you select so that it fits on the DVD media you are burning to.
Finally, if you are burning a data DVD, it’s simply a matter of the file size you are trying to burn and the space available on the DVD.
Video DVD Burning Guide
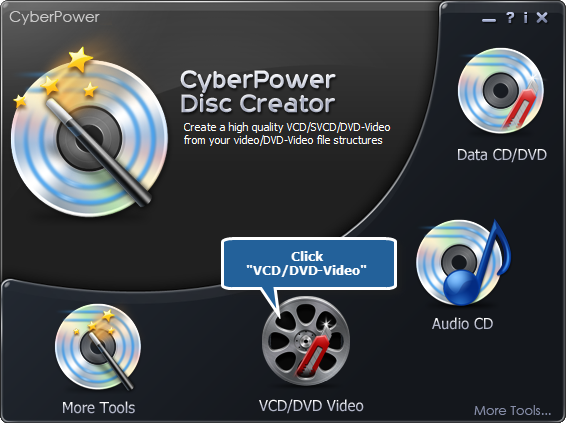
1. Launch CyberPower Disc Creator. Then, insert a DVD to the disc drive, click the “VCD/DVD Video” to run the burner wizard.
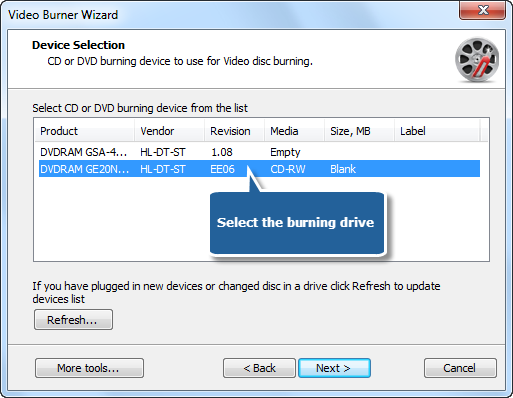
2. The burner scans your system for the available devices. Choose one of the usable burning drives from the list (the system will select it by default if there is only one). If you plugged in new devices or changed disc in the drive, you canupdate the devices list by clicking “Refresh” button.
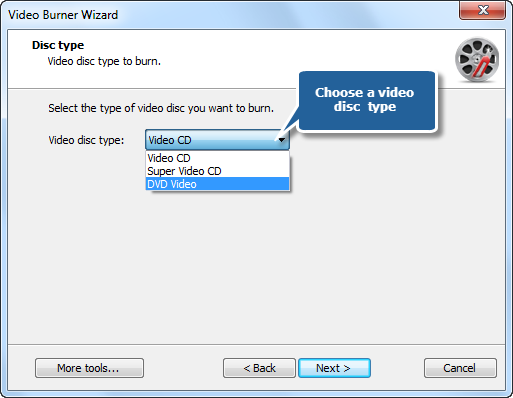
3. Select the “Video DVD” from the disc type menu of “Video disc type” (“Video CD” and “Super Video CD” burning are also supported).
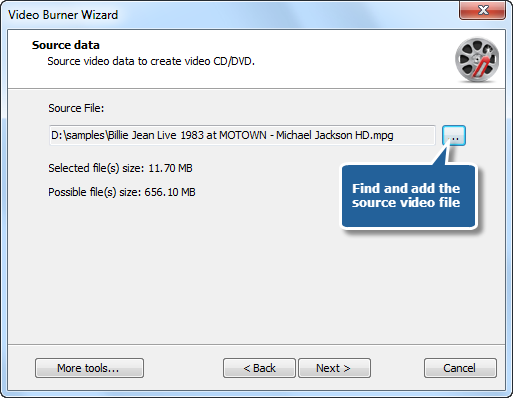
4. Add the source video you want to burn and you can have a review of the selected file size & possible file size (if you want to burn video DVD, add premastered VIDEO_TS folder; burn video CD, add MPEG1 file; burn super video CD, add MPEG2 file).
5. Select one burning mode from Track-AT-Once, Session Track-AT-Once, Disc-AT-Once PQ and Disc-AT-Once raw P-W. You are allowed to use Test Mode to simulate burning for checking errors. Then, choose an appropriate burning speed. Click “Next” to start burning and wait until the process bar reaches 100%. The disc will eject after the video DVD has been completely burned.
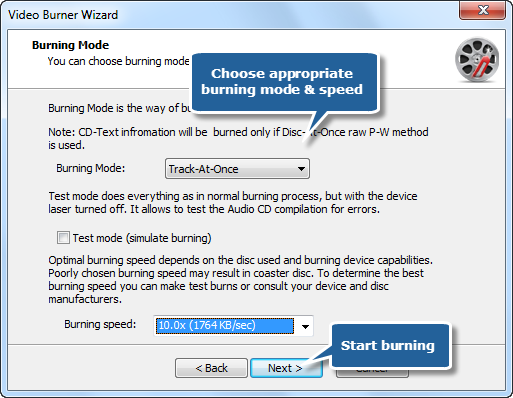
Although the burning speed is optional, but the most important factors that affects speed are file size & the ability of burner drive and your computer.