Looking for CD & DVD burner software? Our CyberPower Disc Creator allows you to burn WAV, WMA, OGG, MP3, ASF, WMVto standard Audio CDs simply clicking on them. Almost everything you might want! Files, folders, pictures, music, video, office docs… You may even create you own audio CDs with few seconds!
What is CD Burning?
Burning a CD means using a CD writable drive to record a custom CD. Nearly all new computers come with the necessary hardware and software to start burning CDs.
Function – An industrially pressed CD contains a series of bumps and depressed grooves to represent digital 0’s and 1’s. Bumps are not reflected back at the laser and are read as a 0.
Types – A consumer-grade CD burner drive burns a blank CD by shooting a laser through a layer of dye sandwiched between a plastic and aluminum coating. The laser turns this dye a darker color so that it does not reflect light (representing a 0). Rewritable CDs contain a compound that turns opaque after cooling when heated by the laser inside the CD-RW drive. A rewritable drive can rewrite a CD-RW by heating up this compound again and again.
Features – A blank CD-R or CD-RW can hold up to 700 megabytes of information, which equates to about 74 to 80 minutes of songs – however, a CD can hold more songs at lower quality or less music as quality increases.
Misconceptions – A CD writable drive cannot burn to a DVD disc. A user who cannot fit their files onto a CD should try downgrading the quality of the file (if possible).
Considerations – After burning a CD-R or CD-RW, a person cannot add files to unused portions of the disc. If using a CD-RW, the user has to erase the entire CD and burn it again.
Audio CD Burning Guide
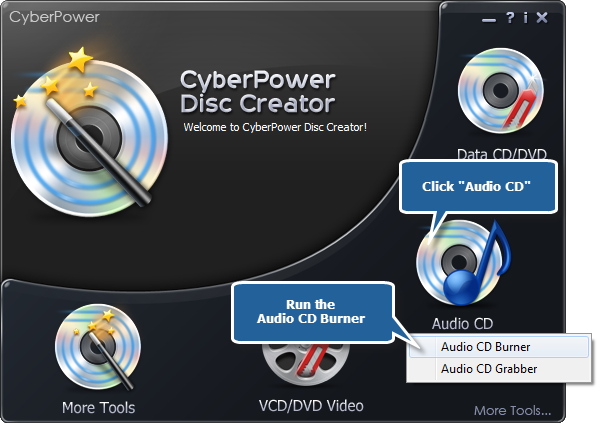
1. Launch CyberPower Disc Creator. Then, insert a blank CD to the CD drive, click the “Audio CD” and choose “Audio CD Burner” to run the burner wizard.

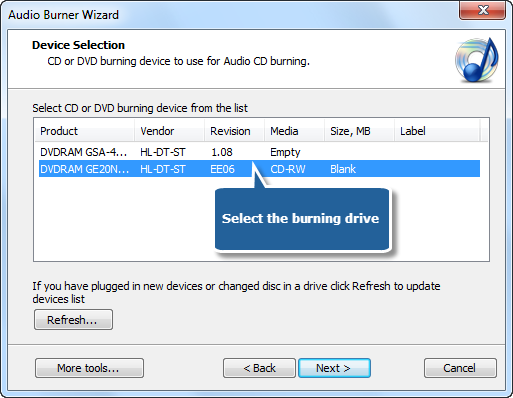
2. The burner scans your system for the available devices. Choose one of the usable burning drives from the list (the system will select it by default if there is only one). If you plugged in new devices or changed disc in the drive, you canupdate the devices list by clicking “Refresh” button.

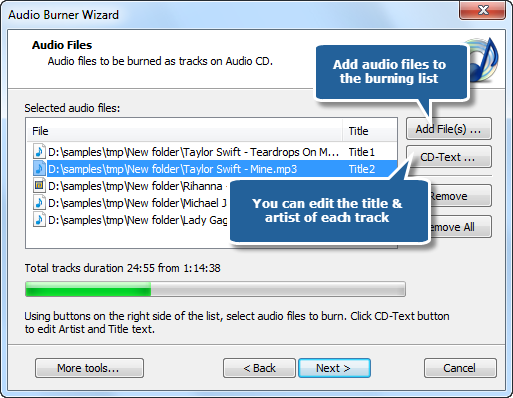
3. Click “Add File(s)…” to input music files you want to burn to the burning list. You are allowed to click “Remove” or “Remove All” button to remove one or all music files. It enables you to use CD-Text to edit title & artist text.

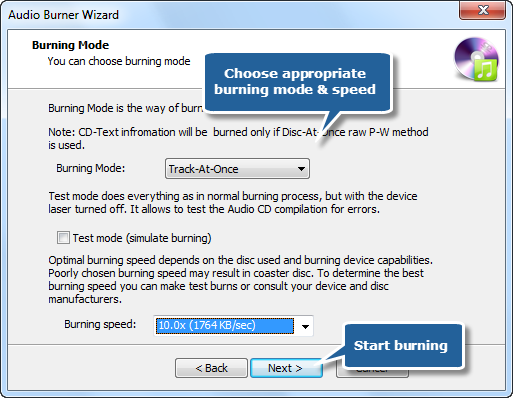
4. Select one burning mode from Track-AT-Once, Session Track-AT-Once, Disc-AT-Once PQ and Disc-AT-Once raw P-W. The test mode is used to simulate burning for checking errors. Then, choose an appropriate burning speed. Click“Next” to start burning and wait until the process bar reaches 100%. The disc will eject after the audio CD has been completely burned.

Although the burning speed is optional, but the most important factors that affects speed are file size & the ability of burner drive and your computer.